


Branding
Before we can actually see anything that we're provisioning, we need to build out the infrastructure that hosts our visual elements. The web part will be consuming our structure, but where does the web part live? On a page. What holds the page? A page layout. What frames the page layout? A master page. Since any SharePoint publishing portal worth paying for will have at least one master page and at least one page layout, we can assume that these will be part of our site, and therefore must of course be part of our deployment.
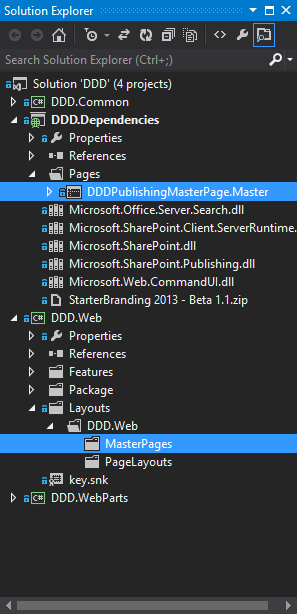
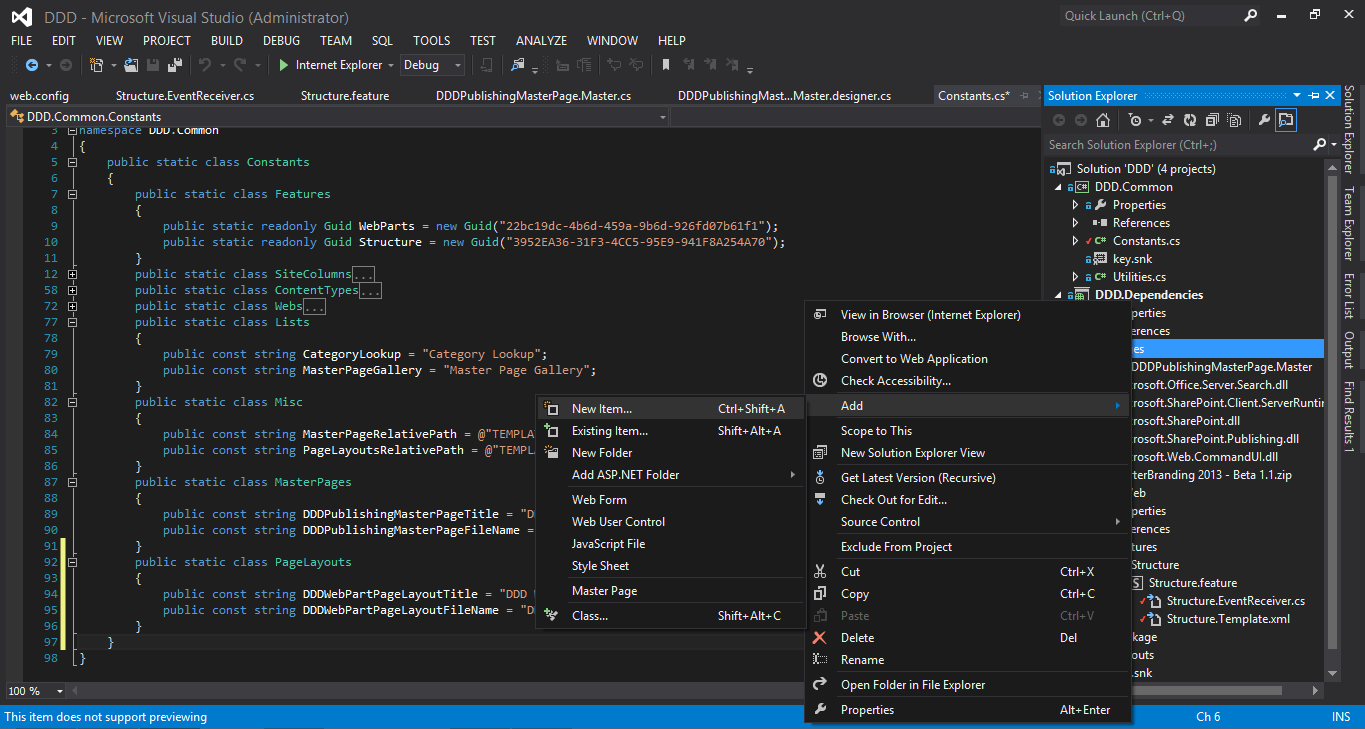
So the first thing we need to do is add both a master page and a page layout in our web project. Create three folders: a mapped SharePoint "Layouts" folder in the root of the project and two more beneath its nested "DDD.Web" folder named "PageLayouts" and "MasterPages." Convention here is very important, as the SharePoint WSP deployment mechanism will create folders on the target web front end server that match the structure we have in Visual Studio. So let's next create "Misc" constants class to hold these two relative paths.
Code Listing 23: Constants.cs
- public static class Misc
- {
- public const string MasterPageRelativePath = @"TEMPLATE\LAYOUTS\DDD.Web\MasterPages";
- public const string PageLayoutsRelativePath = @"TEMPLATE\LAYOUTS\DDD.Web\PageLayouts";
- }
You can use this "Misc" class to house whatever you want in your Constants. In much the same vein as refactoring common functionality into utility methods, I like to group my constants pretty tightly; both logically and in terms of namespacing. Anything that doesn't fit into a group goes here. Think of it as a dumping group for bastard constants.
Master Page
Now let's add a master page.
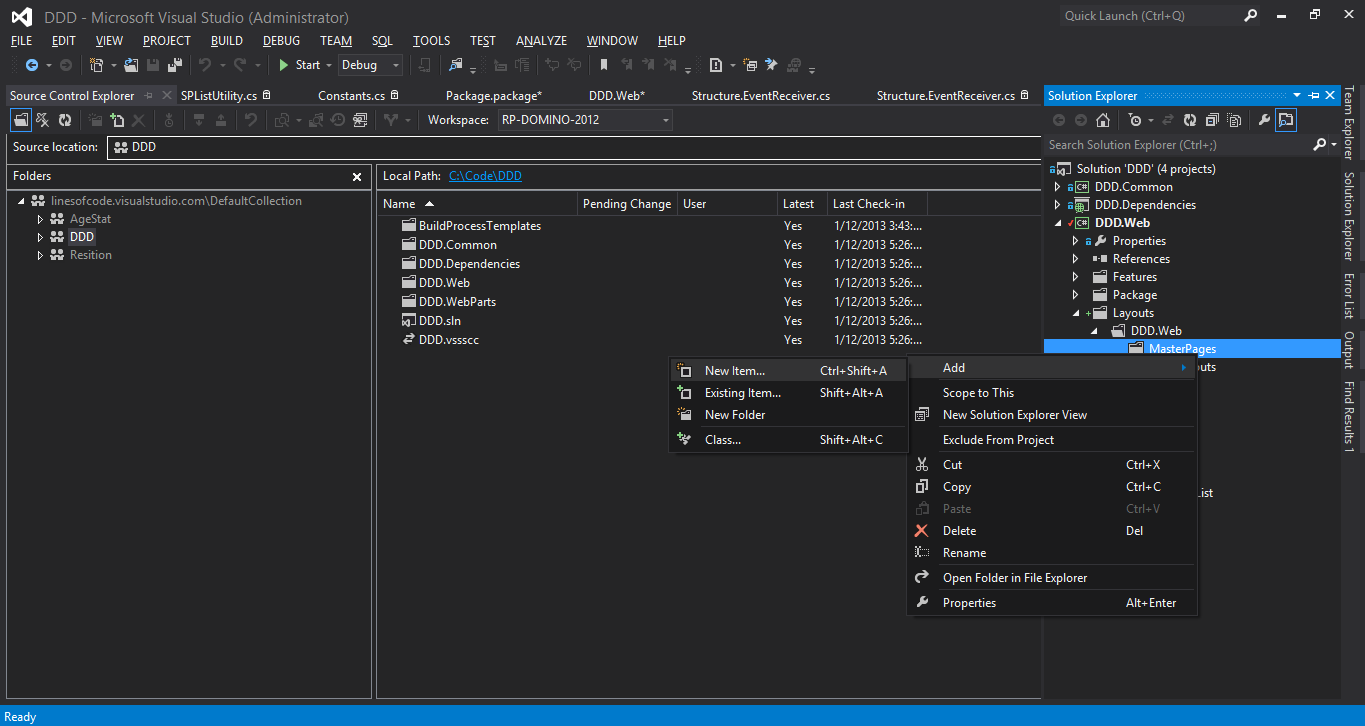
You'll quickly notice that there is no option to add one in the "Add New Item" screen that pops up, since the SharePoint template isn't actually a web project. So we need to get one from somewhere else. This is why the Dependencies project is an ASP.NET web application; we can create web artifacts here and move them to where they need to go. This is also a handy place to stash a SharePoint 2013 minimal/base master page for future reuse.
First, let's add a constant to store the file name for our master page:
Code Listing 24: Constants.cs
- public static class MasterPages
- {
- public const string DDDPublishingMasterPageTitle = "DDD Publishing Master Page";
- public const string DDDPublishingMasterPageFileName = "DDDPublishingMasterPage.Master";
- }
Now, let's take a second to create our minimal master page with code behind.
- Add a new master page (and folder, if you want) to DDD.Dependencies. Call it DDDPublishingMasterPage.Master (or something less lame; I just don't like having the class name of the master page be the same as the project name).
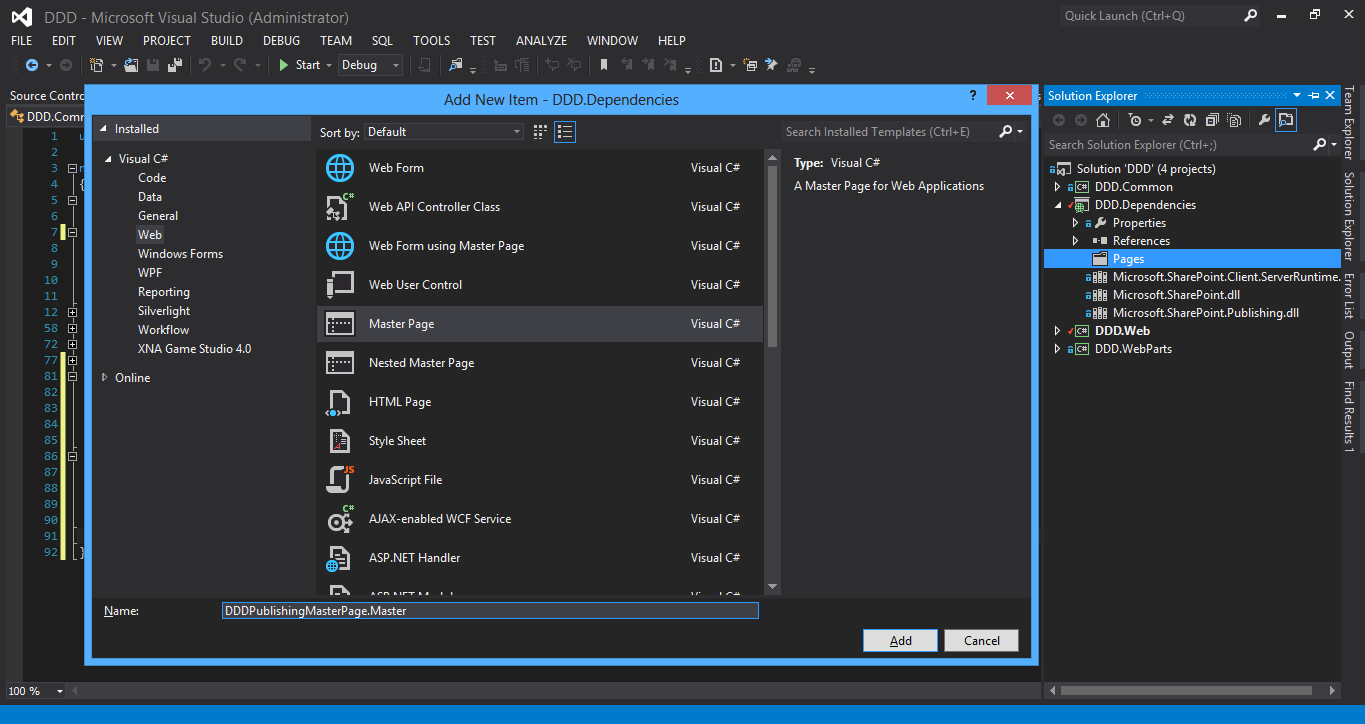 Adding a new master page for real
 - Fortunately, Microsoft has a "minimal.master" in the "Master pages and page layouts" Web Designer Gallery. You can steal that HTML, or since it is very much indeed minimal in scope, poach the markup of "seattle.master" (which is out of the box as well; I use it because it implements the content placeholder for search). I like to add these to DDD.Dependencies\Pages for reference.
- Change the code behind and designer files to have the "DDD.Web" namespace.
-
We need to tokenize our master page so that the proper assembly information is inserted into our markup to wire up the code behind (you should feel shame upon copy-and-pasting an FQN) whenever Visual Studio 2013 finished a compilation of your project. So change the first line, which is:
<%@ Master Language="C#" %>
To this:
<%@ Assembly Name="$SharePoint.Project.AssemblyFullName$" %> <%@ Master Language="C#" CodeBehind="DDDPublishingMasterPage.master.cs" Inherits="DDD.Web.DDDPublishingMasterPage" %>
This allows us to reference our master page's code file "relatively" like we're used to in conventional ASP.NET web forms. The assembly reference above it satisfies SharePoint's requirement to have FQNs for these types reference (since the code is loaded from the GAC). Unfortunately, Visual Studio only tokenizes certain file extensions; .MASTER is not among them (fortunately, .ASPX and .ASCX are). So we need to tell the project to give the same treatment to our master page. Follow this quick procedure to update the list (you can't add any extension that is compiled; markup only):
- Unload the Web project (right click -> "Unload Project"). The project is unloaded, but remains existentially in the solution.
- Now we can edit the .csproj file directly (right click -> "Edit DDD.Web.csproj") in the XML editor.
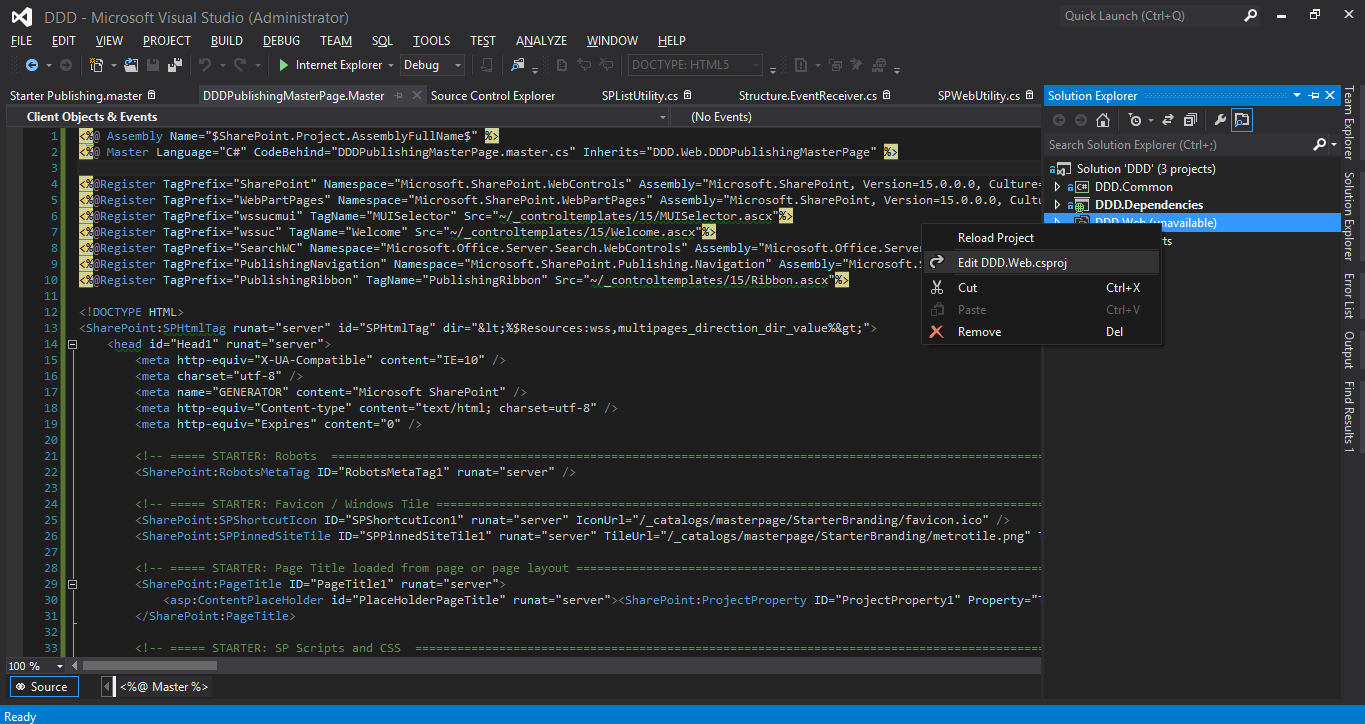 Editing the csproj file
- Add "<TokenReplacementFileExtensions>master;asmx;svc; </TokenReplacementFileExtensions>" as a child element to the first "<PropertyGroup>" node. (These are the only additional extensions I've never used; might as well add them all now.)
- Save the file.
-
Finally, reload the project (right click -> "Reload Project").
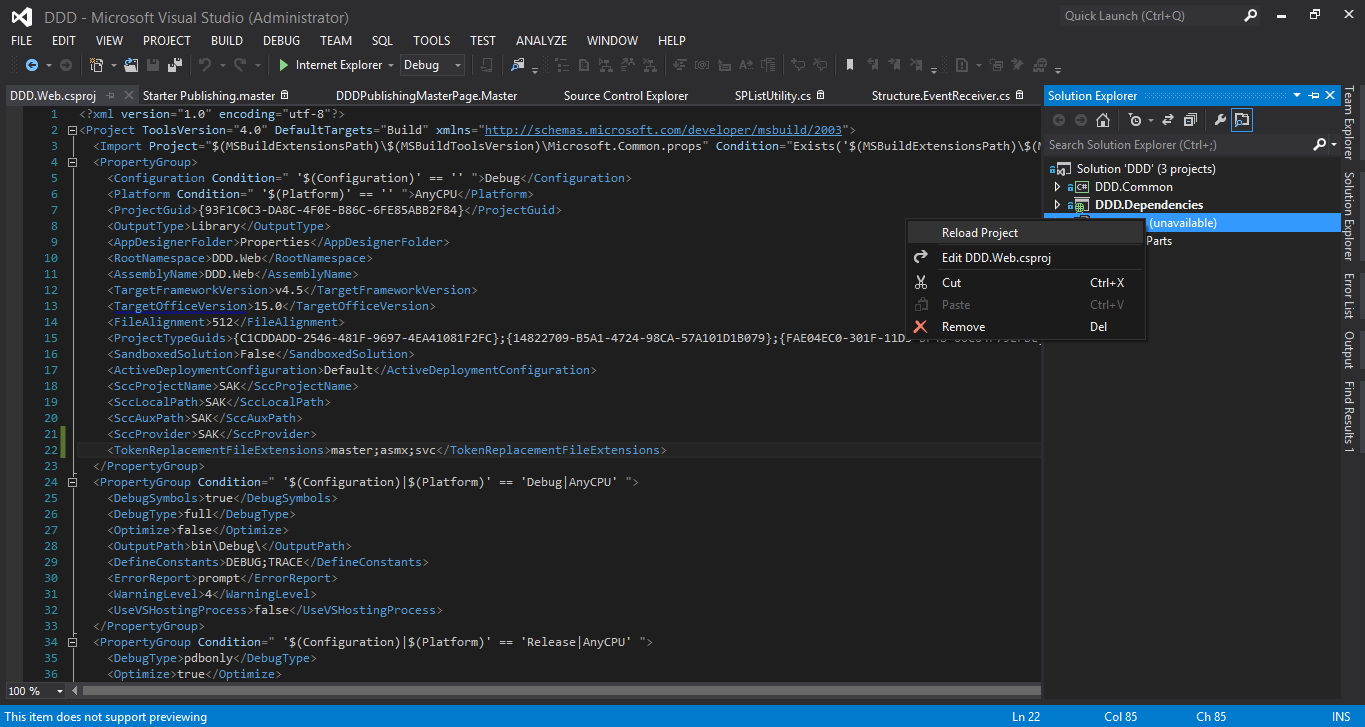 Reloading the csproj
This is a lot of extra lifting, but worth it: not only is it cleaner and more reusable, but we also don't have to go hunting through the GAC or Reflector to find the public key token for our assemblies.
- Fix the namespaces in the code behind and designer files to be "DDD.Web"
- Add "Microsoft.Web.CommandUI.DLL" and "Microsoft.Office.Server.Search.dll" (from 15/ISAPI) to your Dependencies project.
- Add references to the above DLLs as well as Microsoft.SharePoint and Microsoft.SharePoint.Publishing to the Dependencies project (as normal assembly references this time, not actual files).
- Make sure DDD.Web has these references as well.
- Rebuild your Dependencies project. (You might have to touch up some annoying compilation errors in the designer code behind file.) Now we have a baseline master page.
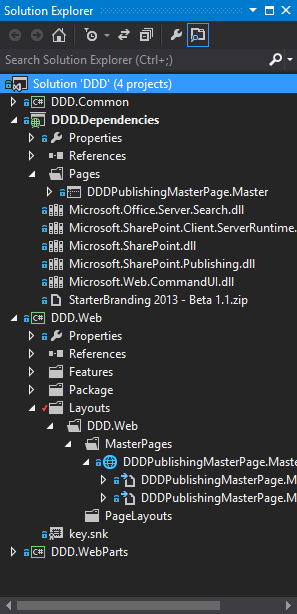
- Next, drag DDDPublishingMasterPage to the "MasterPages" folder in DDD.Web.
 Dragging the master page
 - Rebuild DDD.Web. We now have a master page with code behind!
 Viewing the new master page
Let's make some quick use of our code behind. Something I've added to almost every master page I've ever built is logic that outputs the current year for the "copyright line" at the bottom. This can easily done with JavaScript or slutty inline C# code in the markup, but I prefer to do it code behind proper. Create the lblYear label in the markup, just after PlaceHolderMain:
Code Listing 25: DDDPublishingMasterPage.aspx
- <div style="clear:both;"></div>
- <div class="ms-dialogHidden">
- © Copyright <asp:Label ID="lblYear" runat="server" /> Deployment Driven Design
- </div>
Now add the following to your page load method:
Code Listing 26: DDDPublishingMasterPage.aspx.cs
- //set year
- this.lblYear.Text = DateTime.Today.Year.ToString();
Next we need to add the logic to install this master page to our Structure event receiver. But first, a rant: The "standard" way to do this is with a bunch of Elements.xml files in a new Branding feature. Each has "Module" elements which map all your master pages, page layouts, and page templates to the master page gallery or actual instances of pages. These page skeletons use the frightening AllUsersWebPart thing to weld web parts into zones. For a moderately-sized portal, we're talking dozens of XML files and hundreds of lines of markup.
Perhaps to some, this is a form of elegance: combined with a site template, these massive XML files layout an entire site in markup. It's like a ControlTemplate in Silverlight or WPF, sculpting every nook and cranny of the UI. But XAML is compiled; XML is not. If one tiny little thing changes or breaks, game over. If there's already content in the site when these errors are discovered, then super game over.
I'm revisiting my mantra here once again because doing branding (and page provisioning, as we'll see next) in code seems much more radical to me than throwing away your site template XML files and replacing them with a few dozen lines of C#. In other words, using structure code over a site template isn't too hard of a sell; branding code over module XML files is. No one (who I've ever worked with) loves anything ONET-y. However, a lot of my colleagues will deal with Elements, Modules, and the AllUsersWebPart when it comes to branding and data creating because it's "the right way" to do it.
My contention is simply that it's all the same deal: XML is static, un-compiled, and verbose. Even though Visual Studio's SharePoint integration is awesome and has all these mechanisms in place to automate the provisioning of visual artifacts to our portal for us, they are a mess to work with. With code, we have the full power of Visual Studio InteliSense, Find References, Go To Definition, and myriad other tools that make building these structures, in their entirety, easy.
Here's just how easy it is:
Code Listing 27: Structure.EventReveiver.cs
- //create master page
- SPFile masterPage = root.AddPageToMasterPageGallery(
- Constants.Misc.MasterPageRelativePath,
- Constants.MasterPages.DDDPublishingMasterPageFileName,
- Constants.MasterPages.DDDPublishingMasterPageTitle,
- ContentTypeId.MasterPage,
- null);
- //set master page
- root.SetMasterPage(masterPage, string.Empty);
AddPageToMasterPageGallery takes in the path to where the file to be added is deployed under _layouts, its file name and title, the content type id (master page or page layout), and the associated content type (the content type bound to the page layout, or null for master pages). It gets the bytes of the file, adds it to gallery, sets the appropriate metadata, and checks in, publishes, and approves it (respecting if versioning, moderation, and approval are enabled, respectively).
SetMasterPage forces all webs in the site collection to use this file (returned from AddPageToMasterGallery) as their master page. It also takes in a string to set as the "Alternate CSS Url" property on the webs. As you'll see a bit later in the CSS section, I almost always set this to the empty string and let the CSS referenced in the master page flow through. This simply cuts out a level of complexity around CSS, (which can be a bit nebulous in SharePoint), and allows out styles to properly propagate like a standard ASP.NET site.
When new sub webs are created in a publishing site, they automatically inherit these branding settings from their parent. However, this is not the case in standard "WSS" sites. Since we're in the publishing paradigm in the context of this book, I won't get into much detail about how to account for this in team sites; I don't want to glaze over it. What you'd do is install an Event Receiver of type "WebProvisioned," and have code run that checks if the new web is a PublishingWeb, and if not, runs SetMasterPage against it.
Now there is one drawback to this method: master pages and page layouts provisioned in this manner are considered to be "customized" in the gallery. That is, their content will be read from the content database in SQL, not the ASPX file in _layouts. This presents two issues: a bit of a performance hit (but that's not too big of a deal because it will be cached after the first load) and the inability to edit the HTML of the page on-the-fly (which is of course something we'd never dream of doing in production anyway). I'll have a bit more to say about this later.
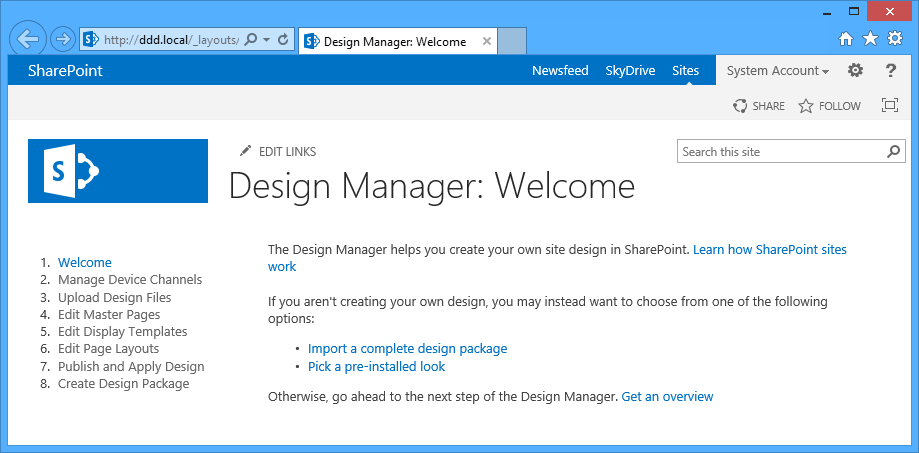
Before moving on to page layouts, I want to point out a very large difference found between SharePoint 2013 branding and that of 2010 and 2007. Designers are now definitely second-class, perhaps even first-class SharePoint development citizens, inasmuch as there is a section in site settings all their own called "Design Manager." Now, even though no designer I know would wish thirty seconds of SharePoint administration upon their worst enemy, I still think it's a good idea on Microsoft's end to promote the branding of SharePoint sites as a separate "pillar" of development.
This will hopefully give SharePoint 2013 a boost in the public website space, as well as making what comes out of the new SharePoint app store sexier. But what does this mean for us developers? With all the game-changing, paradigm-shifting, code-breaking things going on in 2013, do we have to throw away concepts are core as master pages?
The answer is, in short, thankfully, no: using the publishing site collection and site templates (or activating the publishing infrastructure feature at both scopes) we'll see the admin screens we're familiar with. The reason I bring this up is because it's a great example of how to deal with a new version of a technology.
In 2013, there are the concepts of creating minimal master pages on the fly, content types that model "HTML" master pages, "ASP.NET" master pages, and even a "Master Page Preview." Theming has been beefed up. The Design Manager is this involved, eight step wizard-like thing that holds your hand and takes you through all the steps required to brand your site. Armed with the knowledge of the way things used to work, I actually found this more difficult to use than a designer who'd never been around SharePoint before might!
But Microsoft being Microsoft, we still have the legacy way of doing it: a master page gallery and the master page picker admin screen. Is this a good thing; will it keep us dinosaurs in the game? Is this a bad thing; will it keep us from adopting new technology or UX improvements? Only time (and Windows 8 sales) will tell. Let me come to my point:
I was simultaneously annoyed and relieved at how similar the deployment stuff I'm doing is in 2013 compared to 2010. I'm relieved because there's no hit to my productivity; no re-ramp up time needed. But it's also a little annoying because I want to learn new things and grow with and leverage the improvements of new technology, even if it's tough at first. The master page stuff is just an example. After dicking around in Designer Manager for a half hour, I couldn't believe that I found myself Binging "How to apply a custom master page to SharePoint 2013." But I did, and I learned how. Then I flicked on the web-scoped publishing feature, and found what I was looking for in the first place.
So my point is that this is ultimately a good thing, because it allows us to stay productive leveraging all our old tricks while giving us the opportunity to learn the new ropes casually and on our own terms. Perhaps your first 2013 project will really be a 2010 project running on 2013. But along the way you'll see some new pages and functionality and have some new bugs to fix. Then in the second project, pad your estimates, and say "I'm going to use a design package instead of my standard starter master page" and run with it.
The reason I bring all that up is to point out the fact that I'm trying very hard to be platform independent in SharePoint All Code deployments; I am sticking to concepts, APIs, and Visual Studio capabilities that will work in SharePoints ranging from 2007 all the way through 2013. Why? Because despite all the new sugar coating the next version of something, deployments are deployments, in much the same way that patterns are patterns. MVVM is still MVVM, even if you apply it to Silverlight and call it Prism.
So unless the very structural foundation of SharePoint changes, we'll still have WSPs and content types deploying and modeling our data. I believe that intranets will continue to be SharePoint's bread and butter, despite all the new app stuff and cloud stuff. And the ever-inflating server API will continue to be our best friend. That puts my mind at ease: the backend remains the same, allowing me to throw myself at the new challenges presented by other aspects of the platform.
Page Layout
Back to our pages. We've got our frame, so now it's time to build the layout. As far as our Visual Studio project is concerned, page layouts behave more or less the same as master pages: having ASP.NET markup with code behind, containing tokenized fully-qualified class names in the page directives, and being positioned properly in the project folder hierarchy according to convention.
First, of course, our new constant:
Code Listing 28: Constants.cs
- public static class PageLayouts
- {
- public const string DDDWebPartPageLayoutTitle = "DDD Web Part Page Layout";
- public const string DDDWebPartPageLayoutFileName = "DDDWebPartPageLayout.aspx";
- }
Next, let's create one. I'll keep this procedure much more concise, as it very closely mirrors what we did for master pages:
- Since we're starting from scratch, let's create a "minimal" page layout in our Dependencies project.
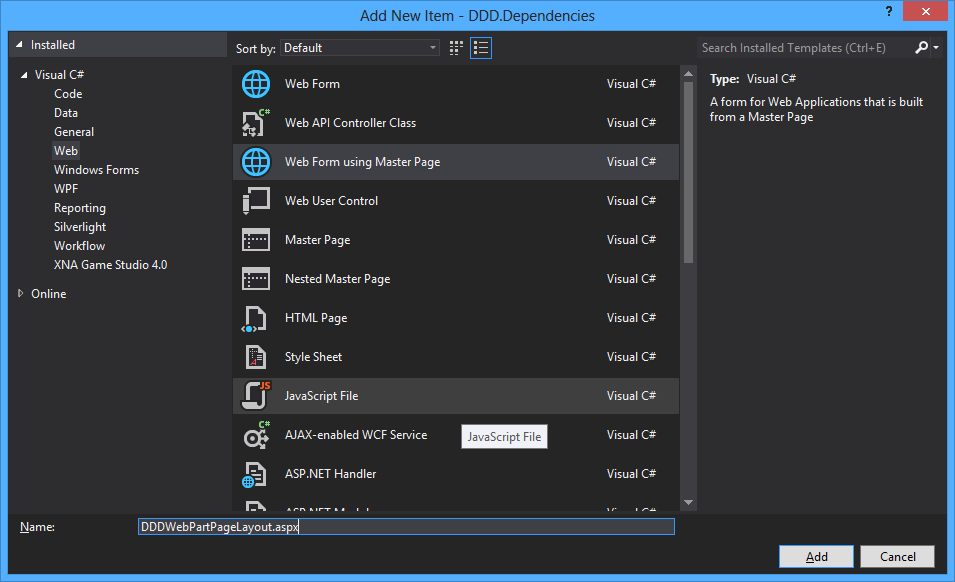
 Adding the Master Page file
 - Call it "DDDWebPartPageLayout.aspx" and select the "Web Form using Master Page" template.
 Specifying the Master Page file
 - Select our master page in the next window.
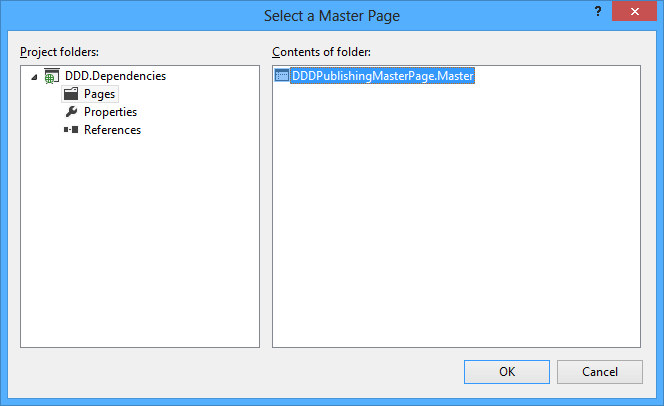 Selecting the Master Page
 - Visual Studio will generate our page's files. The HTML will kindly already contain all of the place holders found on our baseline SharePoint master page. Win.
- As with the master page, make all the namespace references in the markup, code behind, and designer files DDD.Web.
-
Make the following the first line of the markup in the file:
<%@ Assembly Name="$SharePoint.Project.AssemblyFullName$" %>
- Still in the HTML view, change the value of the "MasterPageFile" attribute in the @Page directive to "~masterurl/default.master" so that we suck in the current site's master page.
- Remove the "Title" and "AutoEventWireup" attributes.
- Flip to the code behind. Change the base class to "Microsoft.SharePoint.Publishing.PublishingLayoutPage."
- Rebuild the Dependencies project. This gives us our baseline page layout.
- In Solution Explorer, drag the root node of this page into the "Layouts\DDD.Web\PageLayouts" folder in our Web project.
- Rebuild the Web project.
That's it! Well, not quite. One additional step toward making this a true page layout is adding field controls and web part zones. Field controls allow us to quickly surface page metadata from the associated content type. All of my page layouts have such an association, so that the page instances generated from it are each welded to this data structure, sort of like a model and view in MVC. SharePoint would of course then be the controller.
The true power of field controls is felt when editing the page and seeing labels turn into textboxes, rich text ribbons lighting up, and date pickers appearing. If you model and lay these pages out right, your content authors will love you. However, this is less critical for page layouts that are used for enforcing structure rather than framing content pages. Examples of these are home pages and landing pages for sub sites. Perhaps they have some metadata; layout is really the key, which is driven by arranging web part zones properly.
There's no real technical difference between these two flavors of page layouts; they have the same base class and are provisioned identically. Really the only differentiator is the HTML you write to render the UI, and perhaps the omittance of an associated content type. But since I've basically never had a page layout without metadata of some sort, let's add both to our example here.
- Open the markup of our page layout (now in the Web project; what's in dependencies is only our baseline).
- Add the following @Register directive after the @Page one, so we can reference the proper SharePoint server controls:
<%@ Register Tagprefix="WebPartPages" Namespace="Microsoft.SharePoint.WebPartPages" Assembly="Microsoft.SharePoint, Version=15.0.0.0, Culture=neutral, PublicKeyToken=71e9bce111e9429c" %>
- Now we can drop in a web part zone. Dump this into the "PlaceHolderMain" content block:
<WebPartPages:WebPartZone ID="wpzTop" runat="server" Title="Top" FrameType="None" AllowPersonalization="false" />
- Save the file.
Now let's again update our Structure event receiver to provision this page layout to the master page layout. We'll use the same method from the master page provisioning, except this time, we'll pass it our Rollup Article content type id.
Code Listing 29: Structure.EventReveiver.cs
- //create page layout
- SPFile pageLayout = root.AddPageToMasterPageGallery(
- Constants.Misc.PageLayoutsRelativePath,
- Constants.PageLayouts.DDDWebPartPageLayoutFileName,
- Constants.PageLayouts.DDDWebPartPageLayoutTitle,
- ContentTypeId.PageLayout,
- rollupArticle);
Base page layout
ASP.NET is still of course .NET; our code, although structured to run sort of like an interpreted script, is still object-oriented and provides all the power of polymorphism. This has a lot of uses in SharePoint, namely around page layouts. All publishing page layouts have to inherit from Microsoft.SharePoint.Publishing.PublishingLayoutPage. However, do to the rules of OO inheritance, not directly. You can create a base page layout that inherits from SharePoint's layout, and then have all your page layouts inherit from that.
The benefit of this is of course reusability. A layer of indirection at this point allows you to shove logic in a base page layout that executes on, of course, on every page layout. Examples of such code manipulates HTML, switches master pages, adjusts web part zones, etc. This is different than code in the master page that executes on every page, which might be handling caching, dynamically including files, (CSS, JavaScript, Favicons, etc.) pulling information from the current context, etc.
There's really nothing special you need to do here. Include an abstract class in your Web project that inherits from SharePoint's base, and have all your page layouts inherit from it. Handle events and write code as necessary. Everything deploys all the same. But before diving too deeply into this pool, there is one interesting SharePoint quirk that almost made walk away from base page layouts.
First, here's the code:
Code Listing 30: BaseLayout.cs
- using System;
- using Microsoft.SharePoint.Publishing;
- namespace DDD.Web
- {
- public abstract class BaseLayout : PublishingLayoutPage
- {
- #region Events
- protected override void OnLoad(EventArgs e)
- {
- //base
- base.OnLoad(e);
- //test output
- this.Page.Response.Write("I AM YOUR BASE!");
- }
- #endregion
- }
- }
You'll see in Line #13 that any page inheriting form this base layout will have the text "I AM YOUR BASE" outputted at the top. Next, update your page layouts to inherit from this class:
Code Listing 31: DDDWebPartPageLayout.cs
- public partial class DDDWebPartPageLayout : BaseLayout
Finally, deploy normally, and create a page that uses this layout. When you view the ribbon on a page that uses your inheriting layout, you'll notice that the page and publishing tabs don't work. In fact, when you click on any tab, it will load forever, and the other ones will highlight but you can't into them. The page is sort stuck in an unusable state.
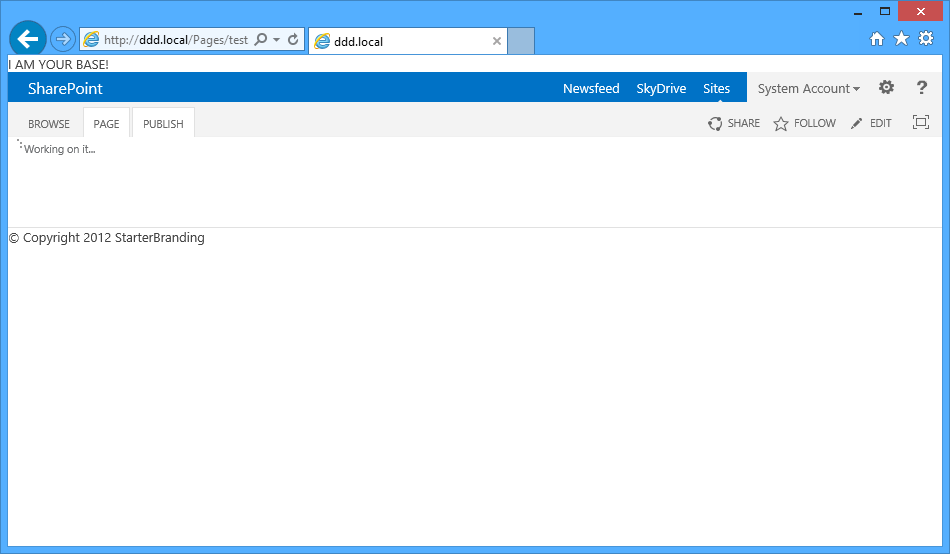
Basically, the site is acting as though publishing is disabled. This is of course not really the case, as evidenced by navigating to the pages library and seeing that all the normal options are still there (Check In/Out, Version History, Approval Status, Publishing Scheduling, Page Layout, etc.). It's just on the page layout itself that this functionality is all missing.
So even though the page technically inherits from the proper SharePoint publishing layout base, it seems as though the layer of indirection that is our intermediary base page layout is fooling publishing into think that it's not. I would love to figure out exactly how SharePoint is making this distinction, but have no idea where to start reflecting in twenty-plus MB of SharePoint code involved here.
So where does this leave us? My recommendation is to go with the flow: inherit directly from Microsoft.SharePoint.Publishing. PublishingLayoutPage, and refactor all your reusable functionality into static methods in our Utilities class in Common. It will be annoying as hell to have to place code into every page layout in your project, despite that face that it's only a one-liner.
Even though this is a bastardization of object-oriented programming, at least we can preserve SharePoint publishing functionality. If you refuse to settle for this, or if you're sick of answering questions like "Why aren't those calls in a base class?" then you can attempt hacking the ribbon, not supporting publishing, or training users to go to the page library to perform editing actions on pages. But like I said, I feel it's best to refactor your code instead of your content authors' workflow.
CSS
Out of the box, in SharePoint's Site Settings page, there's of course the "Look & Feel" section where you can set the master page, logo, welcome page, theme, etc. Clicking "Master Page" takes you to the ChangeSiteMasterPage.aspx page. At the bottom, you can set the "Alternate CSS URL" which is a string representing the location of an internal (style library, _layouts, etc.) or external CSS file.

As stated above in the "Master Page" section, the SetMasterPage function takes in a string that sets this property for the root web, and forces all sub webs to inherit it. I prefer to use a blank string for this, which translates on the UI to ticking the "Use Microsoft SharePoint Foundation default styles" radio button. I really like this option, because it lets us use standard CSS references from the master page for our custom content, as well as the default SharePoint styles for out-of-the-box functionality (like inputs, menus, dropdowns, etc.)
I really don't want to delve any deeper here, because CSS doesn't have any farther-reaching deployment ramifications. If you nestle your CSS files under the mapped Layouts folder in your Visual Studio Web project (in their own "styles" folder of course), they will be copied to 15 all the same. Throw a reference to what this path would be in your Constants file, and either pass it to SetMasterPage or reference it directly in your master page and you're good to go.
That’s basically all there is for CSS and branding in Deployment Driven Design. In the next phase of our All Code deployment, we’ll see how all these aesthetic pieces of our web site will come together when we actually provision a page and start adding content to it. The major benefit of this style of branding deployment over the Design Manager is the tight control we have over our files, and the ability to leverage our knowledge of master pages.
