


Finishing Up
It's almost anticlimactic at this point, but we can now finally complete our web part! Everything that it needs to do its job, from the provisioning of SharePoint structure (webs, lists, fields, content types) to the UI it lives on (master page, page layout, page) can be whisked into existence with the execution of a single PowerShell script.
Optimizing for Application Builds
When we're in development mode here (switch from deployment logic to application logic) we need to relax our automated deployments so we're not waiting minutes between each compilation. Building deployment logic requires this, as it's very easy to get out of sync; application logic, since it can only really be written after an environment has been stood up, isn't as capricious. I want to debug my in-flight web parts via Visual Studio as quickly as I could my in-flight MVC app.
Here are some techniques I use to quickly transfer my IDE from deployment mode to application mode:
- As we're seen already, REM out certain pre/post build commands that kick off scripts or executables. These are only really needed when structure is changing, which shouldn't be the case when we're rolling web parts.
- Edit your Configuration Manager to only compile your web parts. Be CAREFUL with this, as you might make a little tweak to your data layer, forget that it's not being built, deploy, and then much head scratching.
- Right click your solution and bring up the Configuration Manager.
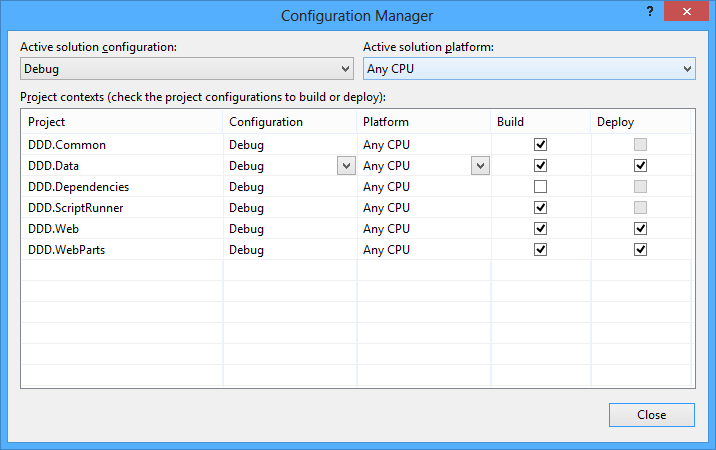 Using the Configuration Manager
- In the first dropdown, select "New..." and call it "LeanBuild" (copying from "Debug").
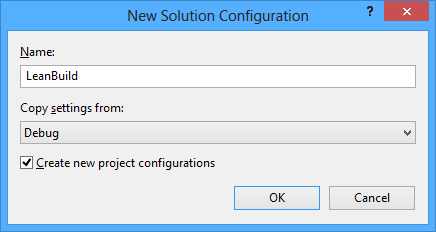 Creating a new configuration
- Clear the checkboxes of things you no don't want to do every build. Note that if we're going to want to F5-debug web parts, we'll have to minimally build and deploy that project. I also like to build any other projects it references (although, like I said, this could be turned off to speed up the build, at the risk of stale code).
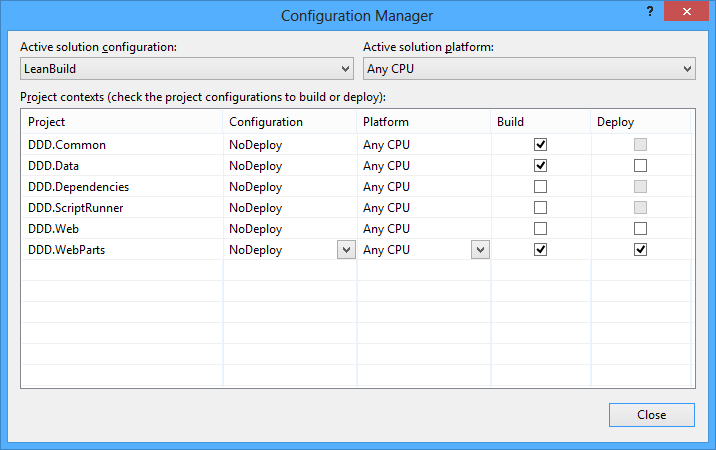 Applying the new configuration
- Click "Close."
- Use this configuration whenever you want to kick off a "lean" application build.
- Right click your solution and bring up the Configuration Manager.
- Use F5-debugging to directly step through your web parts. Make sure you're in debug mode (or a build configuration based off of it) and that your web part project is being built and deployed. Then set a break point in your web part and hit F5! The first time through, you'll have to clean through the following popup (which we're probably used to from ASP.NET debugging):
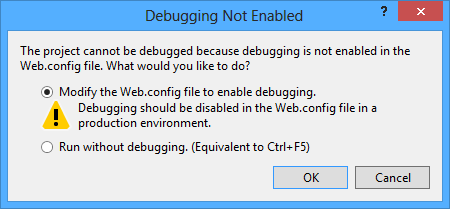 Enabling debugging
If the web part you want to debug isn't already on the home page of the site, add it via the browser that spins up as Visual Studio turns over into debug mode. Otherwise, just sit back, wait for Visual Studio to load SharePoint's assemblies, and your breakpoint will light up! It'll be a bit slow, since deploying the WSP will cause SharePoint to have to do a cold load as its app pool will have been recycled. If the web part you want to debug isn't already on the home page of the site, add it via the browser that spins up as Visual Studio turns over into debug mode. Otherwise, just sit back, wait for Visual Studio to load SharePoint's assemblies, and your breakpoint will light up! It'll be a bit slow, since deploying the WSP will cause SharePoint to have to do a cold load as its app pool will have been recycled.
Code the Web Part
The only thing left to do is consume everything we've built until now. To best demonstrate this, I'll roll a little repeater in the markup of our web part, and bind its data in the code behind. The repository method is responsible for return all of the articles at a particular sub web and converting the results to models. The web part simply displays them. Let's look at the pertinent parts of each real quick:
Code Listing 63: ShowStuffFromList.ascx
- <asp:Repeater ID="rptArticles" runat="server">
- <ItemTemplate>
- <div>
- <div style="float:left;">
- <%# DataBinder.Eval(Container.DataItem, "Title", "{0} " %>
- </div>
- <div style="float:left;">
- <a href='<%# DataBinder.Eval(Container.DataItem, "Url") %>'>Read...</a>
- </div>
- <div style="clear:both;"></div>
- </div>
- </ItemTemplate>
- </asp:Repeater>
Line #5 is just pimping the DataBinder's ability to throw a string.Format at your properties at render time. Unless it requires a large amount of HTML fragments crystalized directly in C# code, I like to let my models do this work. Consider the case with RollupDate in the previous section. The requirement to have an mm/dd/yyyy representation of the date is a business one, and belongs in the data layer.
However, hacking in a space after the title is purely a UI thing, so that's why it lives in the repeater. Don't confuse the two: hardcoding HTML markup in your business objects is hacky. Hardcoding in business logic in your HTML markup is hacky. If you're in a quandary, decide if the presentation is being driven by the front end or the back end, and put your logic there.
Code Listing 64: ShowStuffFromList.ascx.cs
- protected void Page_Load(object sender, EventArgs e)
- {
- //bind
- this.rptArticles.DataSource = SPRepositry.GetAllArticles().OrderBy(x => x.Title);
- this.rptArticles.DataBind();
- }
Yup, that's it. I added an OrderBy to Line #4 just to demonstrate that we don't have to shove EVERYTHING into the data access layer; instead of a bunch of overrides to the same method to specify the sort order, (GetAllArticlesByTitle, GetAllArticlesByDate, etc.) we can make the UI do it. As long as the sorting decision is pursuant to the design and not a hard business rule, I'm fine with a little Lync tacked onto the end of a call to our repository; the UI is still agnostic to the data source, and that's really what matters.
Run the Script Again
Now that we've built everything we need to build to provision a web part and everything behind it, we need to kick off the script one more time to make sure everything works front-to-back. Expand out DDD.Common and its Deployment folder, and double click "DoEverythinger.ps1." It should open in Windows PowerShell ISE. Enter the following command: ".\DoEverythinger.ps1 http://ddd.local" and watch for any red ink. If none appears, browse to your site's home page and see what we've built!
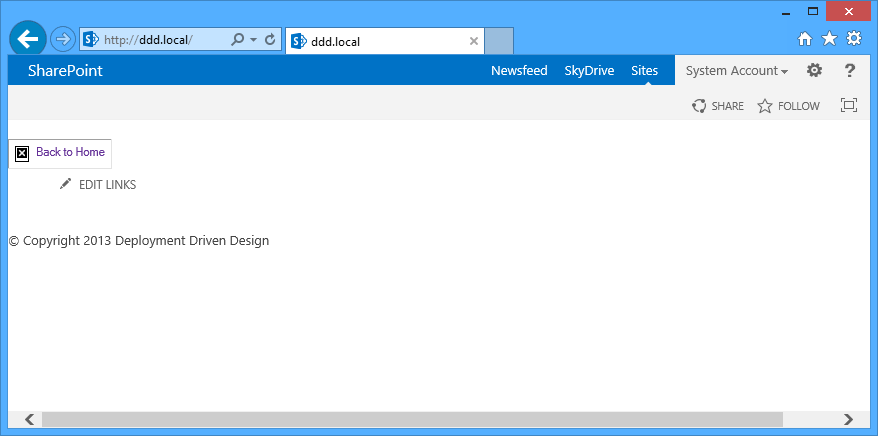
Wait...where's our web part?
