


The Web Part
Next we want to create our web part. Adding a new visual web part to your project is all out-of-the-box goodness. I like to create separate Visual Studio folders (normal ones, not special mapped SharePoint folders) in my project for web parts and tool parts; this gives not only nice organization in my Solution Explorer, but distinct namespaces as well.
Configuration
- Create a folder in the root of the SharePoint project named "WebParts."
- Right click this folder, select "Add" and then "New Item..."
-
Select "Visual Web Part" from the "Office/SharePoint"
template. Name it something fun.
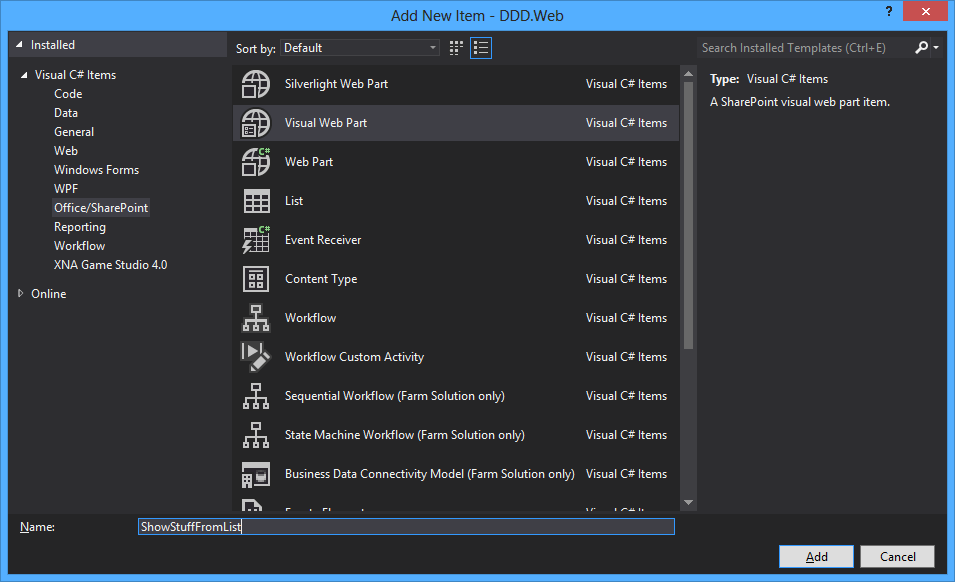 Adding a visual web part
 -
Being OCD about namespaces, I don't
like how the web part's user control uses the name of the web part as the last
stop of the namespace. As it stands, our web part's full name is:
DDD.Web.WebParts.ShowStuffFromList.ShowStuffFromList. Ugly. For each web
part, I go through the following files (line numbers are as they are upon creation)
and prune the final "ShowStuffFromList" from the namespace:
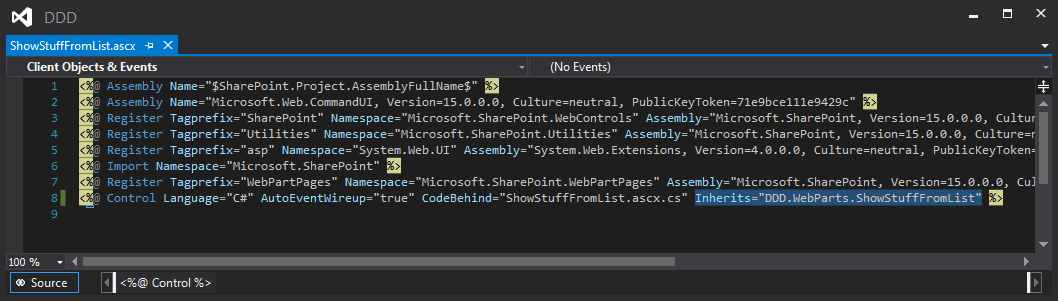
- The .webpart file (Line #5)
- The ASCX file's markup (Line #8)
- The ASCX file's code behind (Line #5)
- Rebuild the solution at this point to make sure we didn't break anything.
-
Now let's go back into the .webpart
file and pretty things up.
- In Line #10, make the "Title" more English sounding: "Show Stuff From List."
- In Line #11, change the "Description" to something less lame.
- Add any other setting pursuant to your requirements that correspond to setting other default properties on the web part (for example, setting the "ChromeType" to "None" as follows: <property name="ChromeType" type="chrometype">None</property>).
- Set the group for the web part by entering "DDD Web Parts" for the "Value" of the "Group" property in Line #5 of the Elements.xml file.
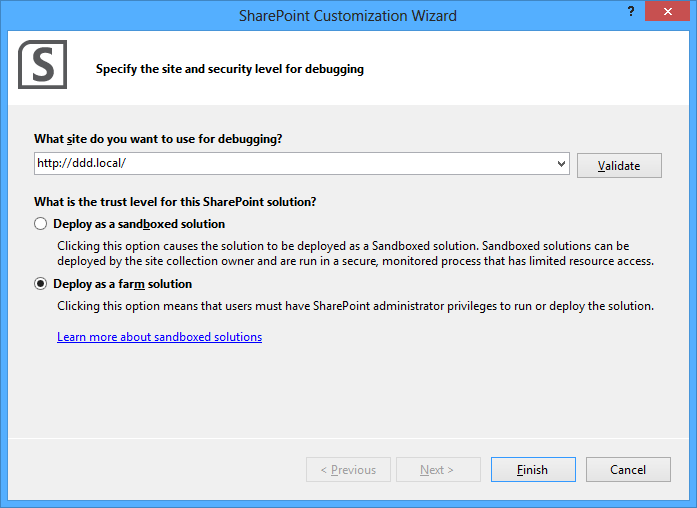
Deployment
Following Deployment Driven Design, we want to plan out how we'll deploy our web part before we build it; we'll need a feature to install it. As I mentioned before, however you organize your features (and other Visual Studio projects / SharePoint Solutions) is going to be different based of course on your requirements. In my experience, with a lot of my projects averaging about six months in duration, I've opted for a single SharePoint project with many features. One of these features is used to install all and only the web parts.
It might also make sense to house your web parts in their own WSP, especially if your project is large enough such that certain team members are dedicated to web parts while others are, for example, working on building the deployment. This allows the web parts to be deployed (and retracted) separately from the rest of your application. But for the time being, we'll stick to a single folder and a dedicated feature to deploy its web parts.
So create a new feature, and
rename it to "WebParts." Other than some metadata (Title, Description, and
Scope – which will be "Site" for a site collection) the feature itself is all
configured. You can optionally play with the aforementioned auto-activation
settings if your requirements specify a desire for one such particular
behavior. But since all this feature will do is install our web parts into the
web part gallery for the site collection, we might as well let it activate upon
installation.
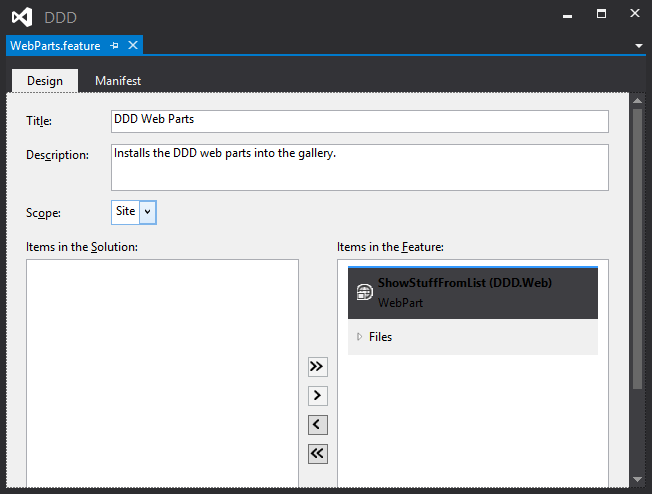
For the previously-created web part (as well as any future ones), we will need to open the new feature's designer and use the ">" button to scoot the desired web part module from the left hand side list of all "Items in the Solution" over to the "Items in the Feature" list on the right. That's it; the Visual Studio SharePoint package will take care of the rest for us!
Well, it would take care of
everything else, except for the fact if you deployed our solution right now as
is, you'll see that we broke it. What happened? First, some background. For
each web part, a SafeControl entry is automatically added. For
ShowStuffFromList, the designer generates this bit of XML automatically:
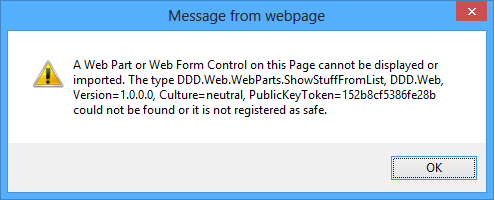
But since we changed the
namespace, this safe control entry is no longer valid. Attempting to add it to
a page will give us this little hand slap:
One option is to, of course, not screw with the namespace; you might find this to be more trouble than it's worth. Another possibility is overwriting the package designer and taking control of the manifest's XML manually. You'll get the current version of it in a normal XML file that you have full control over. However, this kills one of the most useful aspects of Visual Studio SharePoint integration, and sort of puts us back in 2007 land. Ick.
But to be diligent, here's how.
- Double click the "Package.package" node under DDD.Web.
- The Package designer comes up.
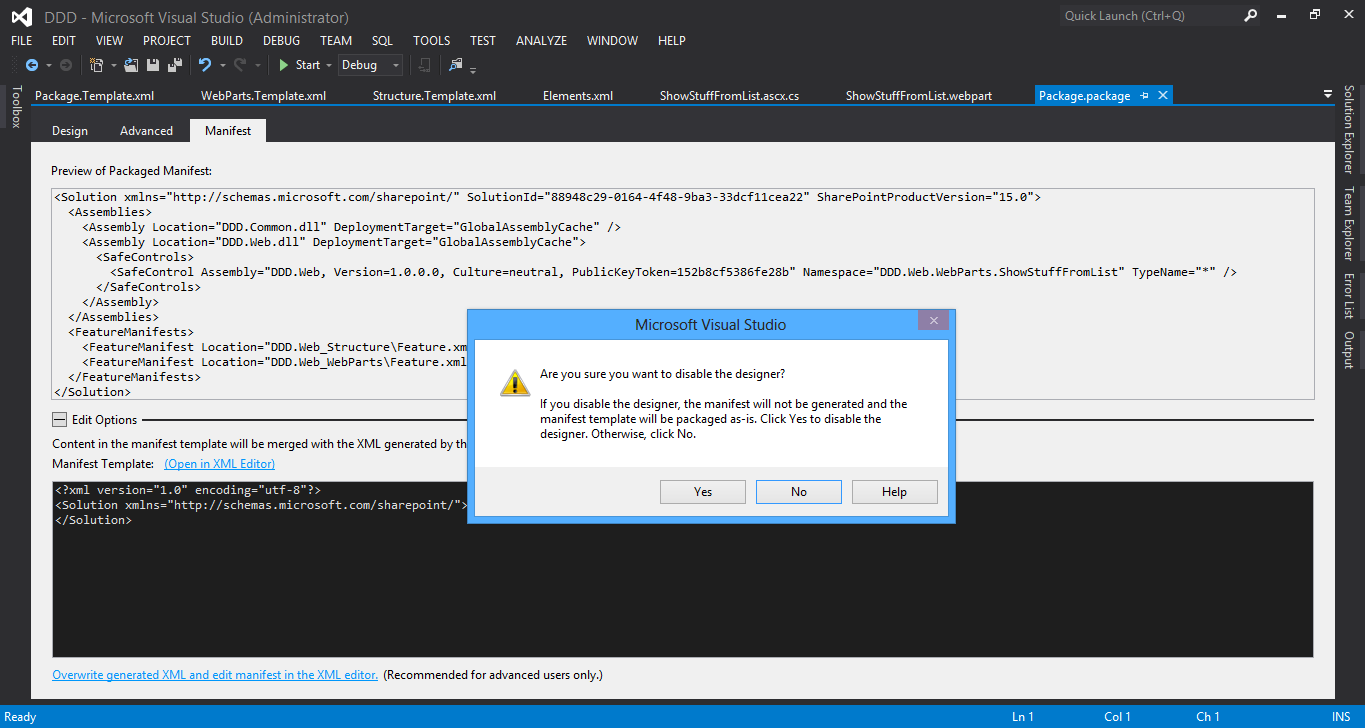
- Click "Overwrite generated XML and edit manifest in the XML editor."
-
Click "Yes" in the box that pops up.
 Disabling the package designer
 -
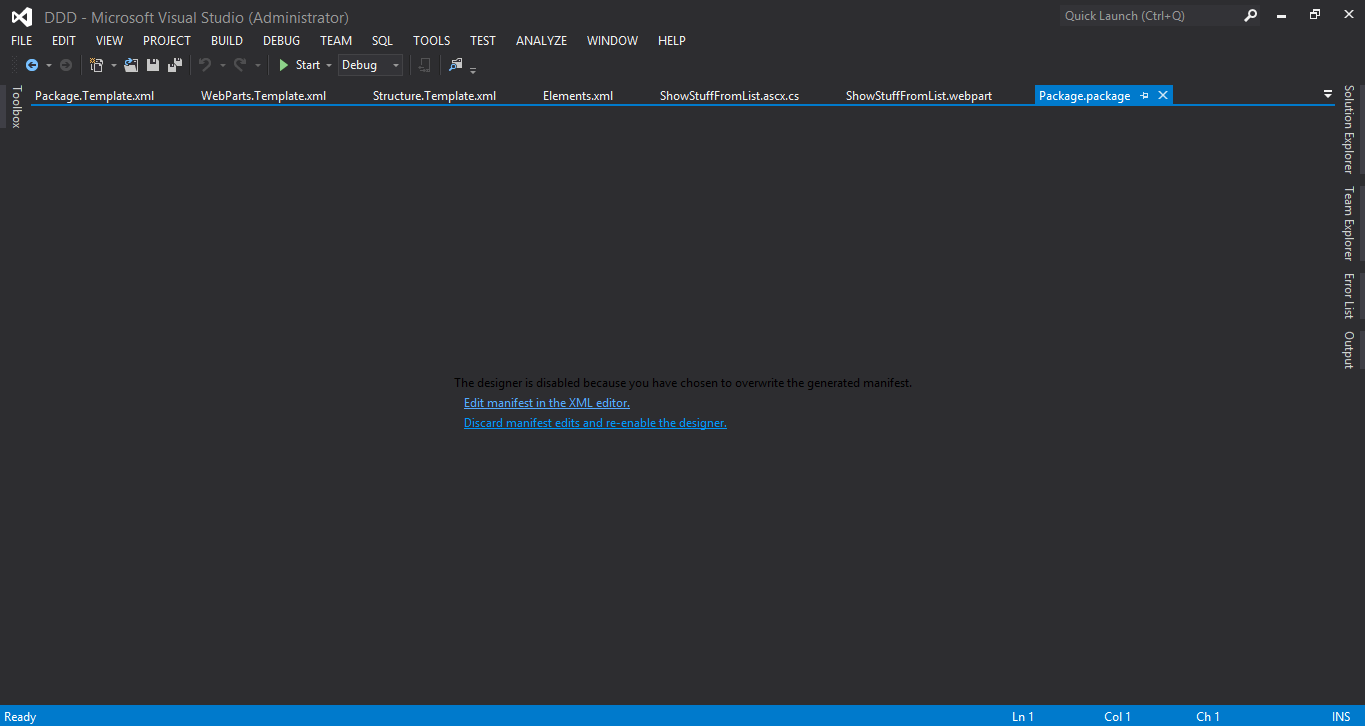
The package designer is disabled.
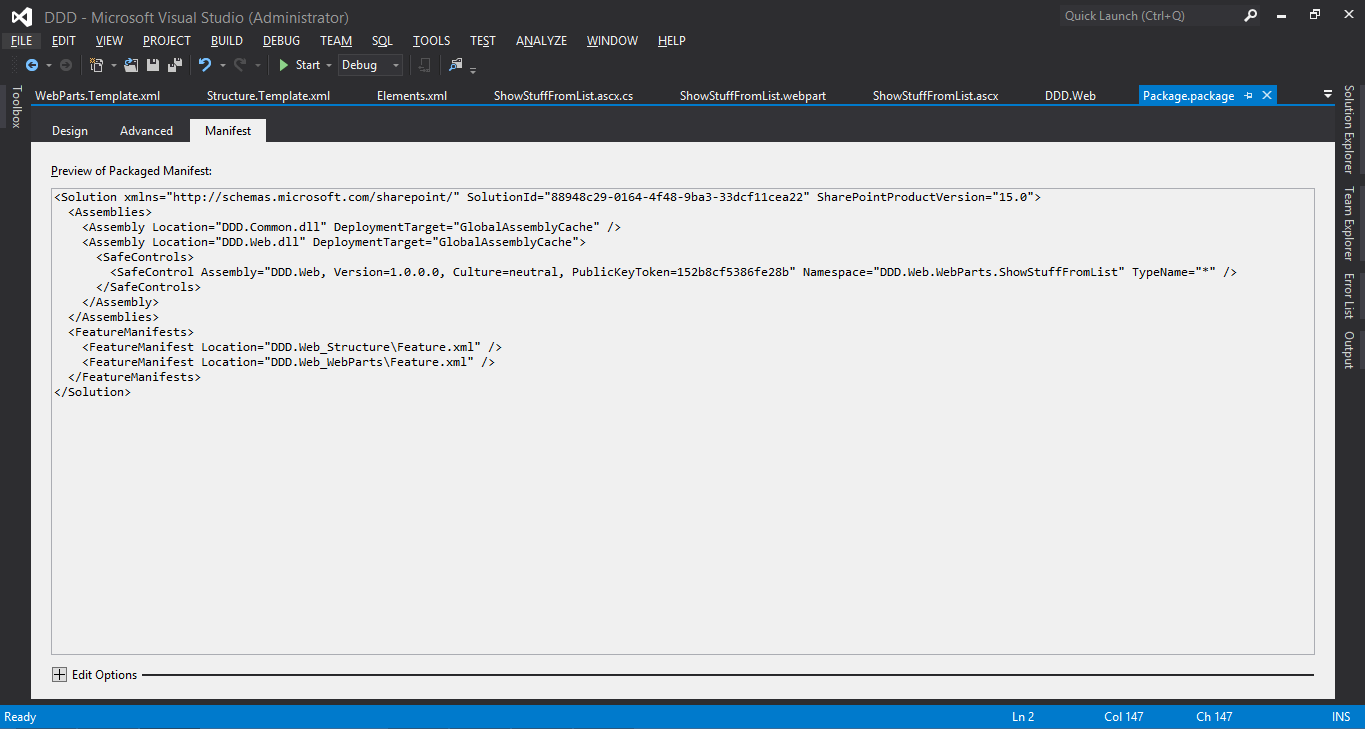
Click "Edit manifest in the XML editor."
 Viewing the disabled package designer
 -
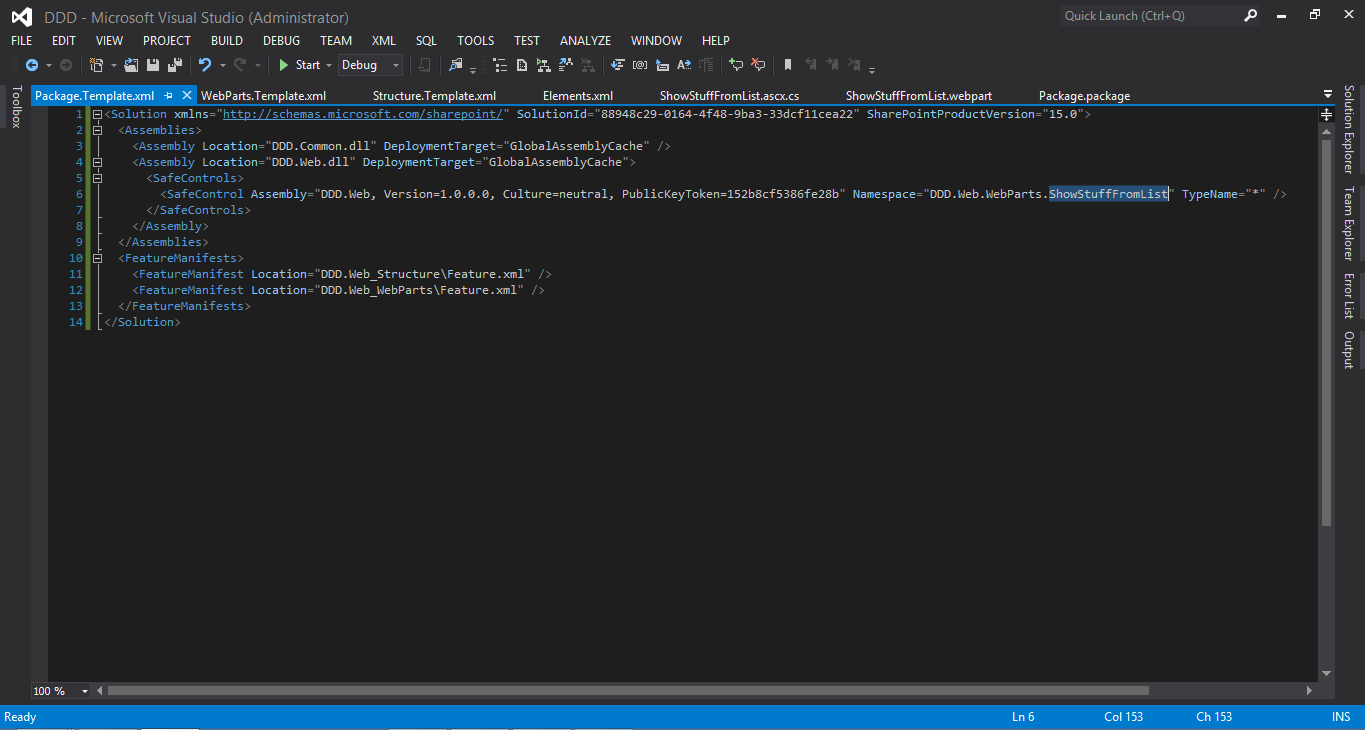
Now you have full control. Updates you
make to the project structure will not be reflected in the WSP's manifest.
 Editing the manifest
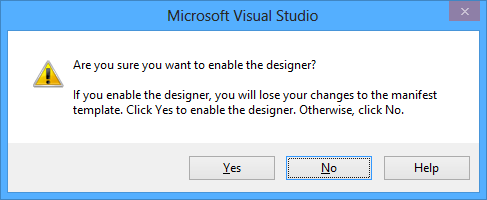
 - When you've had enough and want to give control back to Visual Studio, revisit the package designer (by double clicking "Package.package" again). Click "Discard manifest edits and re-enable the designer."
-
As the following popup says, if you
click "Yes," then all your manual edits will be discarded, and Visual Studio
will immediately update the manifest to match the project structure. It will
then operate normally as you keep working.
 Enabling the package designer
Is this a best practice? I actually go back and forth on that question, which probably means that it's not. However, I love the idea of Visual Studio doing all this package manifesting for us and allowing us to not have to worry about it like 98% of the time, while still letting us override it. The only problem is, like I said, once your override, you have to do it all yourself. It would be nice to be able to make little deltas to what's generated and keep most of it. But until that's the case, either deal with what's generated or accept the responsibility of another XML file to have to manage manually.
Another idea is to ignore all the generated SafeControls, and create a web.config modification that registers a SafeControl entry that covers the correct web part assembly. This one is pretty easy (web.config mods and SafeControls are discussed later under the "Branding" section) and ensures every class under DDD.Web.WebParts is safe. However, if my OCD about messing with the namespaces caused this issue in the first place, then extra crap in the web.config will of course not be allowed.
What I usually end up doing is a hybrid of the manifest take-over using, as I alluded to earlier, a dedicated web parts package. First, create a new SharePoint project in visual studio (called DDD.WebParts), move all web parts and tool parts there, and manually update the SafeControl entry in the package designer to cover my entire assembly.
Like I said, this normally sucks, as we are disabling some really good out-of-the-box Visual Studio functionality. However, as long as this project only houses web parts, it doesn't matter; Visual Studio did all the heavy lifting for us and we are just tweaking it for our purposes. And if things change, you can always revert control of the manifest back to Visual Studio.
Let's break it down. After creating and configuring the new project, drag the contents of the "WebParts" folder into the new project. Placing them in the root is fine, since the namespace is already DDD.WebParts and there won't be anything else in this project (except possibly for a "ToolParts" folder containing classes) to muddle it. Then delete the "WebParts" folder and feature from DDD.Web.
All our namespace modifications will be preserved post-drag; do make sure to remove the ".Web" portions from references in the Elements.xml and .webpart files. This is annoying but a good exercise for the purposes of this demo; if you are doing a similar refactoring in the real world, It might be easier to create the web parts anew and copy-and-paste their HTML and code from their old location.

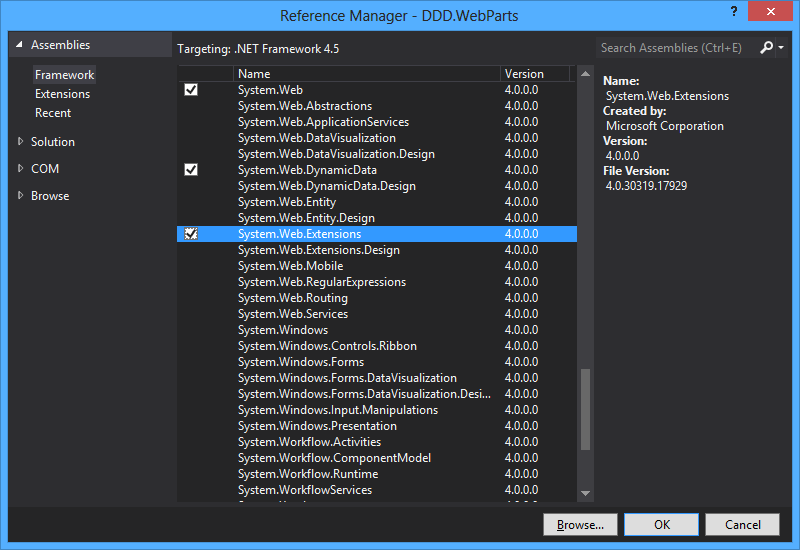
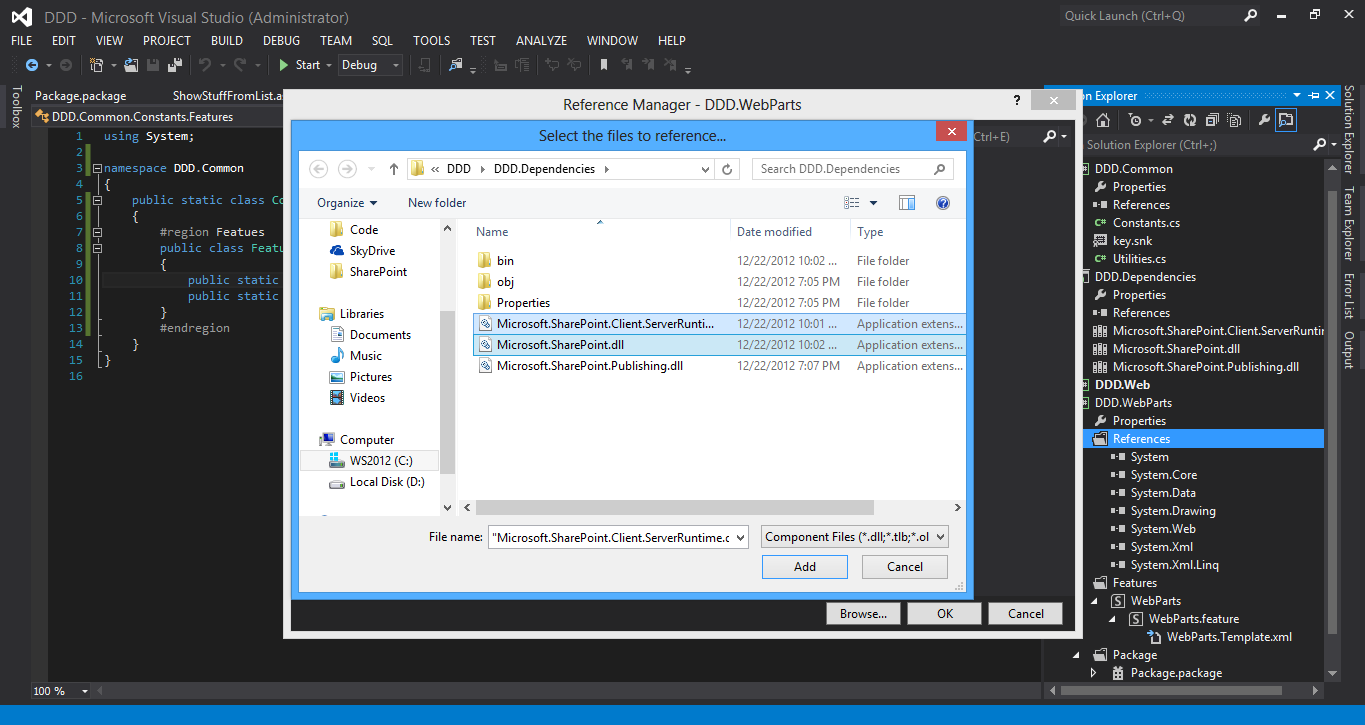
Next we need to add a reference to DDD.WebParts for DDD.Web so we can consume the web part in our Structure feature. Also, take over DDD.WebPart's package designer and sure that "DDD.WebParts" is the value for the "Namespace" attribute in the "SafeControl" element. Finally, pretty up the "Feature1" feature that gets created when you drag the web part in, and update our constants class with the new Guid.
Rebuild to make sure everything is
updated proper. Let's have a quick checkpoint to make sure everything's in
sync. First, the customized package designer for DDD.WebParts:
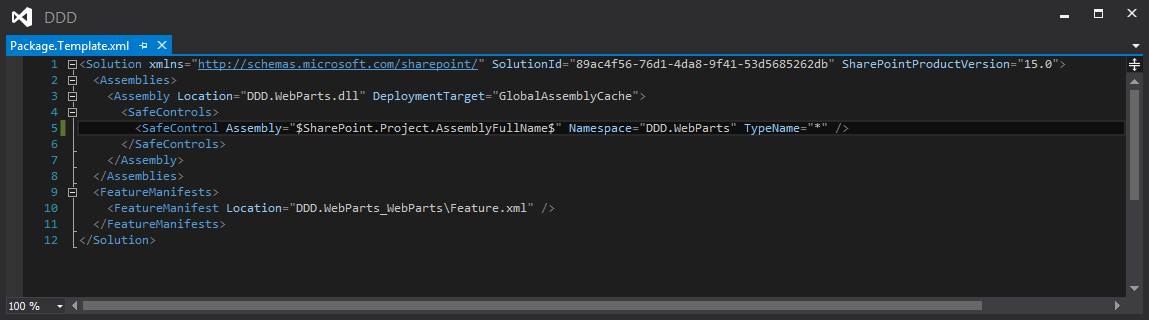
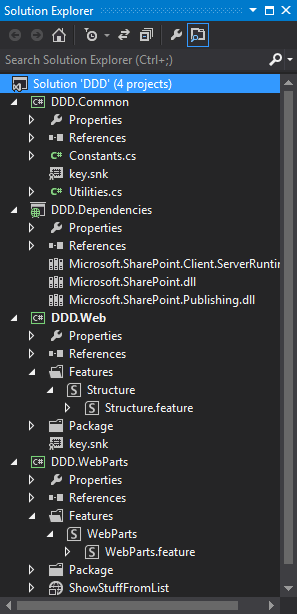
Our solution:
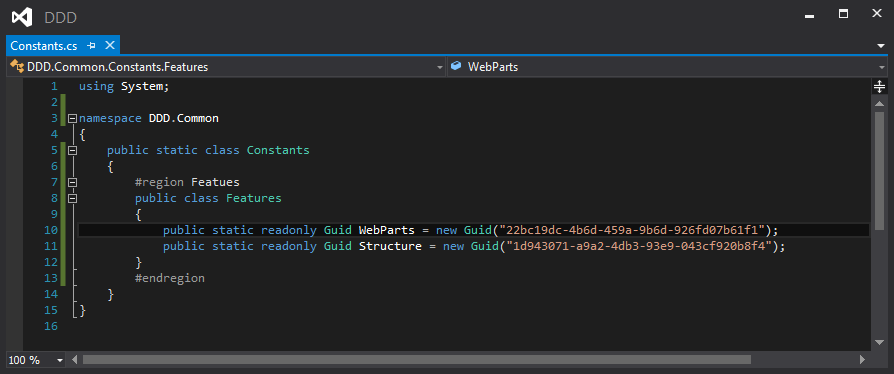
Our constants:
Here's a good checklist of optional (but encouraged) tasks upon creating new SharePoint projects:
- Pretty up any feature names / descriptions.
- Pretty up any property values for web part XML and WEBPART files.
- Ensure that any referenced non-SharePoint projects are included in the package designer as "Additional Assemblies."
- Subject your Namespaces to the proper amount of OCD, in terms of creating folders to force a namespace or removing extraneous chunks of generated ones.
- Take over designers for solution or features when necessary.
- Ensure that the Guids for all features find their way into DDD.Common.Constants.Features.
- Add an assembly reference from the project to the DDD.Web project in Visual Studio. In general, this is the "main" SharePoint solution; it will need to talk to the others; nothing should reference it. For example, DDD.WebParts should be agnostic to its UI (which is indeed DDD.Web).
- Change the output path in the project properties to "..\DDD.Web\Deployment" for all configurations (we'll get to the back story on this one later).
- Use Visual Studio build events and SharePoint deployment events to execute macros which automate PowerShell scripts upon a successful build or deployment, respectively.
- Consider turning off any features' auto-activation settings in the inner Template.xml file.
